
Are you eager to hatch bird eggs at home but unsure where to start? Creating your own bird egg incubator might seem like a challenging task, but with the right guidance, it’s a rewarding and straightforward process.
Imagine the joy of witnessing new life emerge, all thanks to your efforts. By following a few simple steps, you can transform your curiosity into a successful hatching experience. In this guide, we’ll walk you through everything you need to know to make a bird egg incubator, ensuring you’re fully equipped for this delightful venture.
Get ready to dive in and discover how you can nurture life with your own hands!

Credit: www.amazon.com
Choosing Materials
Choosing the right materials for your bird egg incubator sets the foundation for success. Every item you select impacts the temperature control, humidity, and overall stability inside the incubator. Think carefully about durability and ease of use while keeping costs reasonable.
Essential Supplies
Start by gathering the basics that will keep your incubator running smoothly. You’ll need a reliable heat source, such as a low-wattage incandescent bulb or a ceramic heat emitter. A thermostat or temperature controller is crucial to maintain a steady environment.
Don’t forget a hygrometer to monitor humidity levels, since egg development depends on it. Adding a small fan can help circulate warm air evenly. Also, prepare a water tray or sponge to keep humidity within the right range.
Selecting The Container
Your container acts as the incubator’s shell, so pick one that insulates well and allows easy access. Plastic storage bins with tight-fitting lids work great and are easy to find. Wood boxes can provide better insulation but may require more work to seal properly.
Make sure the container is large enough to hold your eggs without crowding. Clear lids or side windows help you check eggs without opening the incubator and losing heat. Ask yourself: does this container keep heat consistent and let me monitor conditions easily?
Tools You’ll Need
Having the right tools on hand speeds up the building process and improves your incubator’s quality. Basic tools include a drill for ventilation holes, a screwdriver for assembling parts, and a thermometer to double-check your thermostat’s accuracy.
A multimeter can help test electrical components safely. You might also want sandpaper to smooth rough edges and adhesive tape or glue to seal gaps. Preparing these tools beforehand avoids frustration and keeps your project on track.
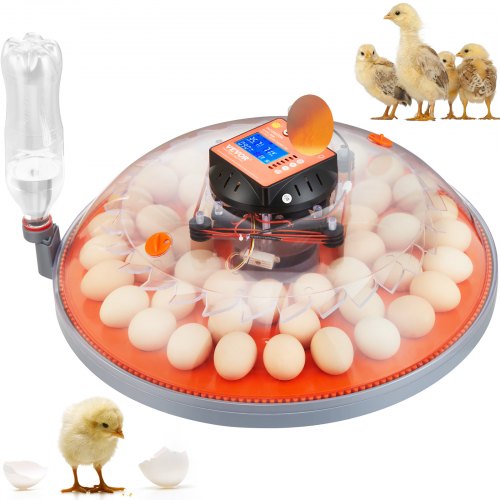
Credit: www.vevor.com
Building The Incubator
Building a bird egg incubator requires careful attention to detail. The structure must hold eggs safely and maintain steady warmth. This section explains how to assemble the base, install the heating element, and add ventilation. These steps create a stable environment for successful hatching.
Assembling The Base
Choose a sturdy box or container as the base. Wood or plastic works well to keep heat inside. The base should be large enough to hold all eggs comfortably. Line the bottom with a soft cloth or foam. This cushion prevents eggs from rolling or cracking. Ensure the lid fits tightly to keep warmth stable.
Installing The Heating Element
A heating element provides the necessary warmth for eggs. Use a small light bulb or a heating pad designed for incubators. Attach the heating element inside the lid or base. Keep it away from direct contact with eggs to avoid overheating. Use a thermometer to check temperature regularly. Aim for a steady 99 to 102 degrees Fahrenheit for most bird eggs.
Adding Ventilation
Proper airflow prevents moisture buildup and keeps air fresh. Create small holes on the sides or top of the incubator. Use a drill or sharp tool to make 4 to 6 tiny holes. Avoid making holes too large to keep heat from escaping. Ventilation helps eggs breathe and reduces mold risk. Balance airflow with warmth for best results.
Controlling Temperature And Humidity
Controlling temperature and humidity is vital for a successful bird egg incubator. Eggs need steady warmth and the right moisture to develop properly. Too much heat or dryness can harm the embryos. Too little can slow growth or cause failure. Keeping these conditions stable helps eggs hatch healthy chicks.
Precise tools and careful monitoring make this control possible. Knowing how to read and adjust the incubator environment ensures good results. This section explains how to measure and maintain the best temperature and humidity.
Using Thermometers And Hygrometers
Thermometers show the incubator’s temperature. Use digital or analog types for accuracy. Place them near the eggs but away from heat sources. Hygrometers measure humidity levels inside the incubator. Choose reliable models for consistent readings. Check both instruments daily to track conditions.
Maintaining Stable Conditions
Keep the incubator in a warm room without drafts. Avoid opening the incubator too often. Sudden air changes affect temperature and humidity. Use water trays or damp sponges to add moisture. Refill water regularly to maintain humidity. Use fans or vents to circulate air evenly.
Adjusting Settings As Needed
Adjust the heat source if temperature rises or falls. Use a dimmer switch or thermostat for fine control. Add or remove water to change humidity levels. Small changes make big differences. Observe the eggs closely and tweak settings carefully. Stability is the key to a healthy hatch.

Credit: www.youtube.com
Monitoring And Care
Keeping a close eye on your bird egg incubator is crucial for a successful hatch. Monitoring and care involve more than just setting the right temperature. You need to interact with the eggs regularly to mimic natural conditions and catch any issues early.
Turning The Eggs
Turning the eggs several times a day prevents the embryo from sticking to the shell. You should aim to turn them at least three to five times daily, ideally at regular intervals. If you forget one day, don’t panic—just resume the schedule as soon as possible.
Try marking one side of the eggs with a pencil to keep track of their orientation. This simple trick helped me avoid confusion during a busy day, ensuring none stayed in the same position for too long. Remember, turning stops about three days before hatching to let the chick position itself properly.
Checking For Development
Candling is a handy way to monitor embryo growth without opening the incubator. Use a bright flashlight in a dark room to shine through the egg and spot veins, movement, or darkening areas. This check usually starts around day 7 and again on day 14 for most bird species.
Noticing no development or unusual spots? It might indicate a non-viable egg, which you’ll want to remove to avoid contamination. Have you considered keeping a simple candling chart? It helps track progress and compare different eggs easily.
Preparing For Hatching
As the hatch day approaches, humidity levels become critical. Increasing humidity to around 65-70% helps soften the eggshell, making it easier for the chick to break out. You can raise humidity by adding water trays or misting the incubator walls carefully.
Stop turning the eggs a few days before the expected hatch to avoid harming the chick inside. Keep the incubator quiet and avoid opening it frequently to maintain stable conditions. Are you ready to witness the fascinating moment when life begins? Proper care at this stage makes all the difference.
Frequently Asked Questions
How Does A Bird Egg Incubator Work?
A bird egg incubator mimics natural warmth and humidity. It keeps eggs at a steady temperature and turns them regularly. This environment helps embryos develop properly until hatching.
What Materials Are Needed To Make An Incubator?
You need a container, heat source, thermometer, and a small fan. Also, water trays help maintain humidity. These materials create a controlled environment for egg incubation.
How To Maintain Temperature In An Egg Incubator?
Use a reliable thermostat or heat lamp to control warmth. Monitor temperature daily, keeping it around 99. 5°F (37. 5°C). Adjust heat sources as needed to ensure a stable climate.
How Often Should Eggs Be Turned In An Incubator?
Turn eggs at least three to five times daily. Regular turning prevents the embryo from sticking to the shell. Stop turning eggs three days before hatching.
Conclusion
Building a bird egg incubator takes patience and care. Keep the temperature steady and check the eggs often. Clean your incubator to avoid germs. Turning the eggs helps the chicks grow well. This simple project can bring joy and learning.
Anyone can try it with basic tools and effort. Remember, success comes from attention and time. Enjoy watching new life hatch from your incubator.