Are you ready to improve your irrigation system and save time on watering? Installing a Rain Bird swing pipe can make a big difference in how efficiently your garden or lawn gets watered.
But if you’re wondering how to get started or worried it might be complicated, you’re in the right place. This guide will walk you through every step, using simple instructions that anyone can follow. By the end, you’ll have your swing pipe set up perfectly, so your plants get the water they need without any hassle.
Keep reading, and let’s make your watering system smarter and easier!
Gathering Required Tools
Before you begin installing the Rain Bird Swing Pipe, gathering the right tools is crucial. Having everything on hand saves time and prevents frustrating interruptions. It also ensures your installation goes smoothly, avoiding damage to the pipe or your irrigation system.
Essential Equipment
Start by collecting these key items:
- Rain Bird Swing Pipe Kit:This includes the pipe, connectors, and any necessary fittings.
- Pipe Cutter or Hacksaw:Use this to trim the pipe to the correct length.
- Measuring Tape:Accurate measurements help avoid mistakes.
- Shovel or Trenching Tool:Needed for digging trenches where the pipe will sit.
- Gloves:Protect your hands from sharp edges and dirt.
- PVC Primer and Cement:If your installation requires joining PVC parts.
- Screwdriver or Wrench:To tighten any fittings securely.
Having these tools ready lets you focus on the installation itself. Imagine stopping midway because you forgot the primer—that’s frustrating and avoidable.
Safety Precautions
Safety is often overlooked, but it should be your priority. Wear gloves to protect your hands from cuts and abrasions. Eye protection is a smart choice when cutting pipes or working with cement.
Be mindful of underground utilities before digging. Contact your local utility companies to mark lines and avoid accidents. Have a first aid kit nearby just in case.
Are you ready to work safely and efficiently? Taking these precautions upfront makes the process less stressful and more successful.

Credit: p2brelay.com
Preparing The Installation Site
Preparing the installation site is crucial for a smooth Rain Bird swing pipe setup. A well-chosen and prepared site ensures the irrigation system works efficiently. Take time to assess your yard and plan the layout carefully. Proper preparation reduces future maintenance and water waste.
Choosing The Right Location
Select a spot that covers the area needing irrigation. Avoid places near large trees or deep roots. These can damage pipes or block water flow. Check for underground utilities before digging. The site should have easy access for maintenance and adjustments. Aim for even ground to prevent water pooling.
Clearing And Leveling The Area
Remove grass, rocks, and debris from the chosen spot. Clear the space to create a smooth working area. Use a shovel or rake to level the ground. A flat surface helps the swing pipe move freely. Compact the soil lightly to prevent shifting. This step keeps the system stable and efficient.
Step-by-step Installation Process
Installing the Rain Bird swing pipe is simple with clear instructions. Follow these steps for a secure and effective setup. Proper installation ensures your irrigation system works smoothly. Take time to prepare each connection carefully. This process helps avoid leaks and damage.
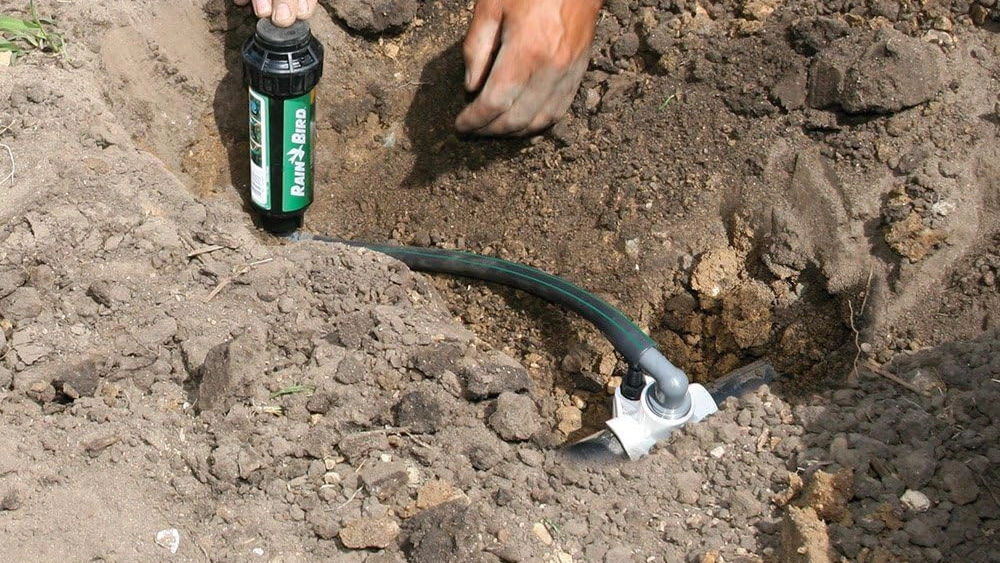
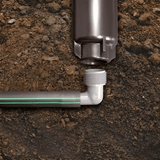
Connecting The Swing Pipe
Start by aligning the swing pipe with the main water line. Push the pipe firmly into the fitting. Ensure the pipe is straight and fully inserted. Use clean pipe ends to get a tight seal. Avoid forcing the pipe to prevent cracks.
Securing The Joints
Use pipe clamps or quick-connect fittings to secure joints. Tighten clamps evenly for a strong hold. Check that fittings fit snugly without gaps. Apply waterproof tape or sealant if needed. This step stops leaks and keeps pipes stable.
Testing The Setup
Turn on the water supply slowly to check for leaks. Watch all joints and connections carefully. Listen for unusual sounds like hissing or dripping. Fix any leaks by tightening or resealing joints. Confirm water flows freely through the swing pipe without blockages.

Credit: www.amazon.ca
Maintenance Tips For Longevity
Keeping your Rain Bird Swing Pipe in top shape doesn’t have to be a chore. Simple maintenance steps can extend its life and keep your irrigation system running smoothly. Paying attention to small details during upkeep can save you time and money down the road.
Regular Inspection
Check your swing pipe regularly for any signs of wear or damage. Look out for cracks, leaks, or loose connections that might affect its performance. Catching problems early helps you fix them before they turn into bigger issues.
Make it a habit to inspect the pipe after heavy rain or strong winds, as these conditions can sometimes cause unexpected damage. Cleaning dirt and debris around the joints also prevents clogging and keeps water flowing properly.
Troubleshooting Common Issues
If you notice uneven watering or reduced pressure, start by checking the swing pipe for blockages. Small debris like leaves or dirt can easily clog the system. Remove the pipe and flush it with water to clear any obstructions.
Another common problem is loose fittings causing leaks. Tighten any loose parts carefully without overdoing it, as overtightening can crack the pipe. If a section is damaged, replacing just that piece is often simpler than swapping the entire setup.
Have you ever found a slow leak that was tough to spot? Try running your system and watching closely along the pipe’s length for small drips or wet spots. Early detection can prevent water waste and improve system efficiency.
Credit: cheapsprinklers.com
Frequently Asked Questions
What Tools Are Needed To Install Rain Bird Swing Pipe?
To install Rain Bird Swing Pipe, you’ll need a pipe cutter, a shovel, and connectors. Additionally, you’ll require a Rain Bird Swing Pipe, fittings, and a Teflon tape. These tools will help you effectively set up the irrigation system, ensuring a smooth installation process.
How Deep Should The Swing Pipe Be Buried?
The Swing Pipe should be buried at a depth of 6-12 inches. This depth protects the pipe from potential damage. It also ensures efficient water distribution. Make sure the trench is level to prevent water pooling.
Can I Connect Swing Pipe To Any Sprinkler Head?
Yes, you can connect Swing Pipe to most sprinkler heads. Use compatible fittings for a secure connection. Ensure the connections are tight to avoid leaks. This flexibility makes it a versatile choice for various irrigation systems.
How Do I Prevent Leaks In Swing Pipe Connections?
To prevent leaks, ensure all connections are tight and secure. Use Teflon tape for added security. Regularly check for any signs of wear or damage. This maintenance will help prolong the system’s efficiency and prevent water wastage.
Conclusion
Installing a Rain Bird swing pipe is simple and quick. Follow each step carefully for the best results. Check all connections to avoid leaks or damage. Regular maintenance keeps your irrigation system working well. Enjoy efficient watering with your properly installed swing pipe.
This small effort saves water and time in the long run. Feel confident managing your garden’s irrigation with this guide. Keep your tools handy for easy future adjustments. Your garden will thank you with healthy, green growth.