
Are you looking to add a charming touch to your garden while inviting beautiful birds to visit? Building your own bird bath is easier than you might think, and it’s a rewarding project you can complete in just a few simple steps.
Imagine the joy of watching colorful birds splash and play right outside your window. In this guide, you’ll discover how to create a bird bath that’s not only attractive but also safe and comfortable for your feathered friends. Ready to bring more life and nature to your outdoor space?
Let’s get started!
Choosing The Right Location
Choosing the right location for your bird bath is crucial to attracting feathered visitors and keeping them safe. The spot you pick affects how often birds visit and how comfortable they feel. Think carefully about the environment around your bird bath to create a welcoming oasis.
Finding A Safe Spot
Birds need a place where they feel secure from predators like cats and hawks. Place your bird bath away from dense bushes or tall trees where predators can hide. Open areas near shrubs or trees provide quick escape routes but avoid spots with too much cover close by.
Have you noticed birds avoiding certain areas in your yard? It might be because those spots feel risky. Choose a spot with good visibility so birds can spot danger early and fly off quickly.
Considering Sunlight And Shade
The amount of sunlight your bird bath gets impacts both the water temperature and how often birds will visit. Morning sun helps warm the water gently, making it more inviting after cold nights. Too much afternoon sun can heat the water too much and cause it to evaporate fast.
Try to find a balance by placing the bath where it gets sun in the morning and shade in the afternoon. You could also move it seasonally or add a small umbrella for shade. Birds appreciate cooler water during hot days, just like you do.
Ensuring Easy Access For Birds
Birds prefer a clear path to their water source. Avoid placing the bath too close to heavy foot traffic or noisy spots that might scare them away. Low branches or perches nearby help birds rest before or after drinking.
Think about the size and shape of your bird bath too. A shallow bowl with gentle slopes lets birds land and drink safely. Imagine watching your bird bath filled with different species comfortably landing one after another—this happens when access is easy and inviting.
Credit: www.hgtv.com
Selecting Materials
Choosing the right materials for your bird bath is crucial to create a safe and inviting spot for birds. The materials you pick will affect durability, maintenance, and how well it blends with your garden. Think about what suits your space and how much effort you want to put into upkeep.
Types Of Bird Baths
Bird baths come in a variety of materials, each with its own advantages. Concrete and stone offer a natural look and last a long time but can be heavy and harder to move. Plastic and resin options are lightweight and often cheaper, but they might not withstand harsh weather as well.
Metal bird baths, like those made from copper or aluminum, add a stylish touch and age beautifully, but they can get hot under direct sun. Wood gives a rustic feel but needs regular sealing to prevent rotting. Consider what fits your style and climate best.
Durable And Safe Options
Durability is key since bird baths face outdoor elements all year round. Concrete and stone are top choices because they resist weather damage and don’t easily tip over. However, ensure the surface is smooth to protect birds’ feet from injury.
Plastic and resin are safe if you pick UV-resistant versions to avoid cracking. Avoid materials that absorb too much heat or have sharp edges. You want a bird bath that stays cool and comfortable for your feathered visitors.
Tools Needed
Gathering the right tools will make building your bird bath easier and safer. Basic tools include a trowel or spatula for shaping concrete, a drill for attaching parts, and sandpaper to smooth rough edges. A level helps keep your bird bath stable and balanced.
Wear gloves to protect your hands, especially when working with heavy or rough materials. Having a bucket or wheelbarrow nearby for mixing or carrying materials also speeds up the process. Are you ready to gather what you need and start building?
Step-by-step Construction
Building a bird bath can be a rewarding project that attracts feathered friends to your garden. The process involves a few clear steps that anyone can follow, even if you’re new to DIY. Let’s break down the construction into manageable parts so you can create a beautiful and functional bird bath with confidence.
Preparing The Base
Your bird bath needs a strong, stable foundation to keep it safe and steady. Start by selecting a flat area in your garden free from obstacles. Clear away any debris and level the ground using a shovel or garden rake.
If you’re using concrete or stone for the base, mix the materials according to the instructions and pour or place them carefully. Let the base cure or settle fully before moving on. This step is crucial—have you ever seen a bird bath wobble and spill water? A solid base prevents that.
Assembling The Bath
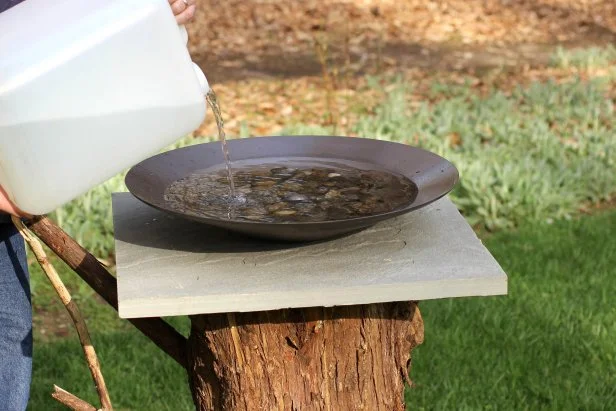
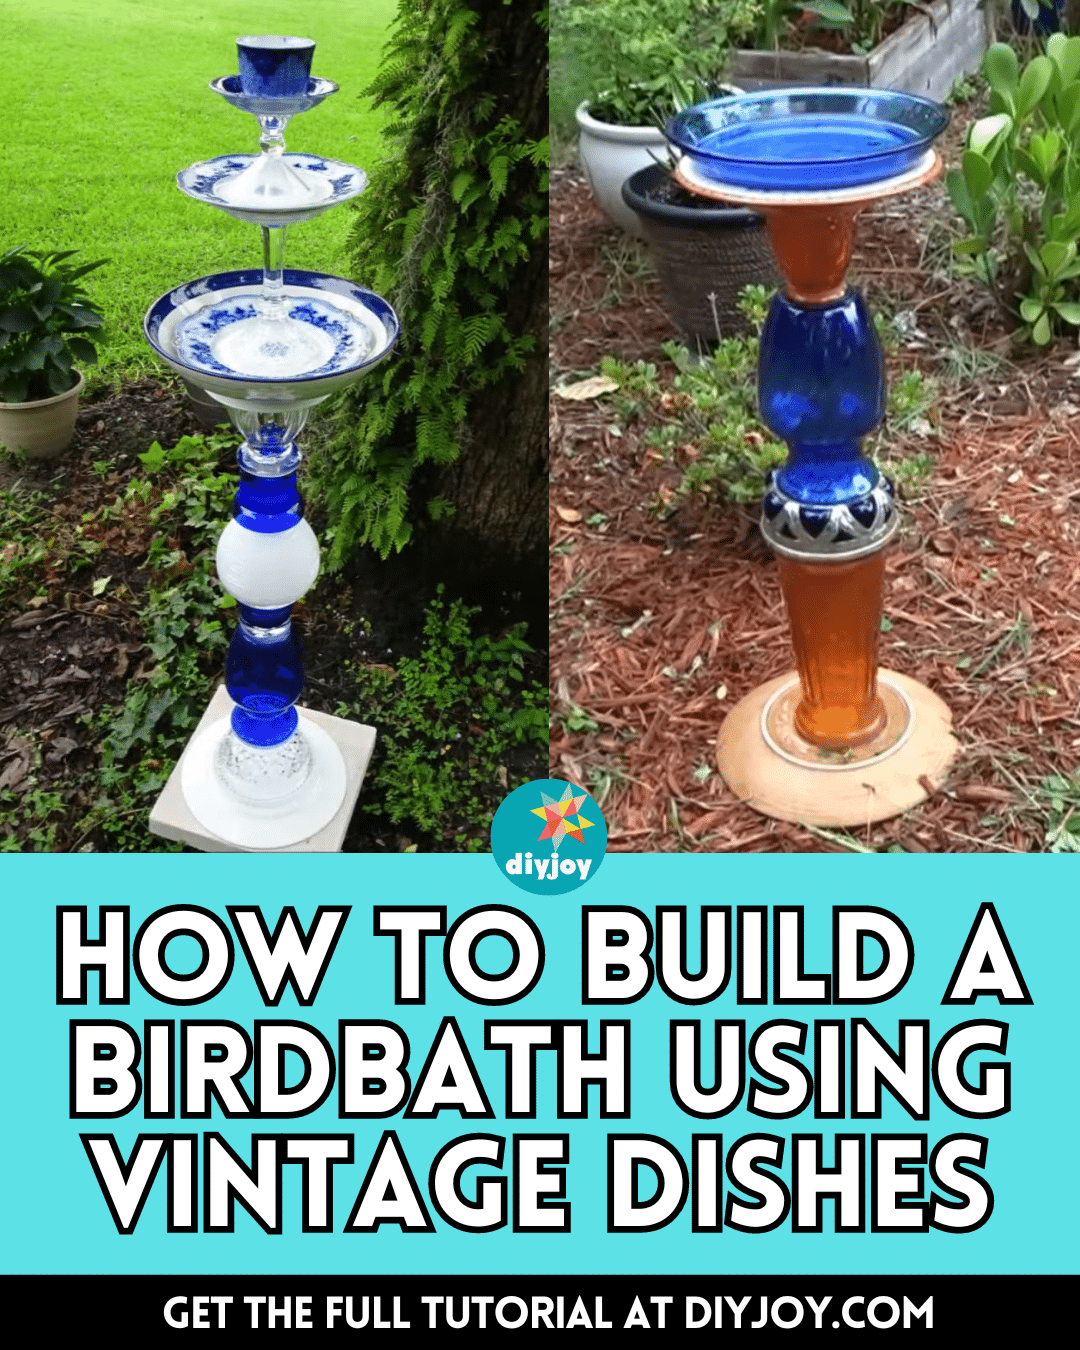
Choose a basin or bowl that suits your style and size needs. You can use ceramic, metal, or even a repurposed dish. Place the basin securely on the base, ensuring it sits flat and won’t tip over.
To add stability, consider using waterproof adhesive or brackets, especially if your base or basin is heavy. This keeps everything locked in place. Think about how you want the water depth—birds prefer shallow water, so don’t fill it too deep.
Sealing And Finishing Touches
Sealing your bird bath protects it from weather damage and makes cleaning easier. Use a non-toxic, waterproof sealant safe for wildlife and apply it evenly on the basin’s surface. Let the sealant dry completely before adding water.
Adding decorative touches like stones or small plants around the base can enhance the bath’s look and provide perching spots for birds. Remember, your bird bath should be inviting but also easy for you to maintain. How will you balance beauty with practicality in your design?

Credit: housefulofhandmade.com
Maintenance Tips
Maintaining a bird bath is essential for keeping birds safe and happy. Clean water attracts more birds and prevents health issues. Regular care helps your bird bath last longer and look great.
Cleaning Schedule
Clean your bird bath every few days. Remove leaves, dirt, and bird droppings. Use a brush with soft bristles to scrub the basin. Avoid harsh chemicals that can harm birds. Rinse thoroughly with fresh water before refilling.
Water Replacement
Change the water at least twice a week. Use fresh, cool water to keep birds comfortable. Stagnant water can spread bacteria and cause illness. During hot weather, replace water daily. Always ensure the water level is safe and shallow for birds.
Preventing Algae And Pests
Place the bird bath in a shaded area to reduce algae growth. Add small stones or pebbles to the basin for bird footing. Use a natural brush or scrubbing pad to remove algae regularly. Keep the surrounding area clean to prevent pests like mosquitoes. Consider adding a small water fountain to keep water moving and fresh.
Credit: diyjoy.com
Frequently Asked Questions
What Materials Are Needed For A Bird Bath?
To build a bird bath, you’ll need a basin, a sturdy base, and waterproof sealant. Consider using materials like concrete, ceramic, or plastic. A shallow basin is ideal for birds. Ensure the base is stable to prevent tipping. Additionally, sandpaper can help smooth any rough edges for bird safety.
How Deep Should A Bird Bath Be?
A bird bath should be no deeper than 2 inches. This depth is ideal for small birds to comfortably bathe and drink. If it’s deeper, consider adding stones or pebbles to raise the bottom. A shallow design ensures birds feel safe and can easily access the water.
Where Should I Place My Bird Bath?
Place your bird bath in a quiet, shaded area. Ensure it’s visible to birds but away from predators. Proximity to trees or shrubs can offer birds a quick escape. Avoid placing it under feeders to keep it clean. Regularly check water levels and cleanliness for optimal bird health.
How Often Should I Clean My Bird Bath?
Clean your bird bath at least once a week. Use a scrub brush and mild soap to remove algae and dirt. Rinse thoroughly to remove soap residue. Regular cleaning ensures a healthy environment for birds and prevents the spread of diseases.
Refresh water daily to keep it inviting.
Conclusion
Building a bird bath brings joy to your garden space. It invites birds to visit and stay close. Choose simple materials and follow easy steps. Keep the bath clean and refill with fresh water. Watch colorful birds enjoy their new spot.
This small project adds life and peace around you. Start today and enjoy nature’s quiet moments. A bird bath is a lovely, helpful garden addition.